
I remember the first time I watched a struggling reader finally “get it.” Seven-year-old Marcus had been fighting tears every time we practiced sight words. Traditional flashcards made him shut down. Then we tried tracing letters in shaving cream. His eyes lit up. Within three weeks, he had mastered 47 new words. That was the moment I truly understood the power of multisensory reading techniques.
Multisensory reading techniques are teaching methods that engage two or more senses simultaneously. Sight, sound, touch, and movement work together to create stronger neural connections for literacy learning. These approaches help all students build better reading skills, but they are absolutely transformative for learners with dyslexia, ADHD, or other learning differences.
In this guide, I will share the exact multisensory reading techniques you can use today. These are practical, proven activities that work in classrooms, homeschool settings, and even for remote learning. I have personally used each of these methods with dozens of students over my years as a reading specialist. By the end, you will have a complete toolkit for implementing multisensory instruction with confidence.
Table of Contents
What Are Multisensory Reading Techniques?
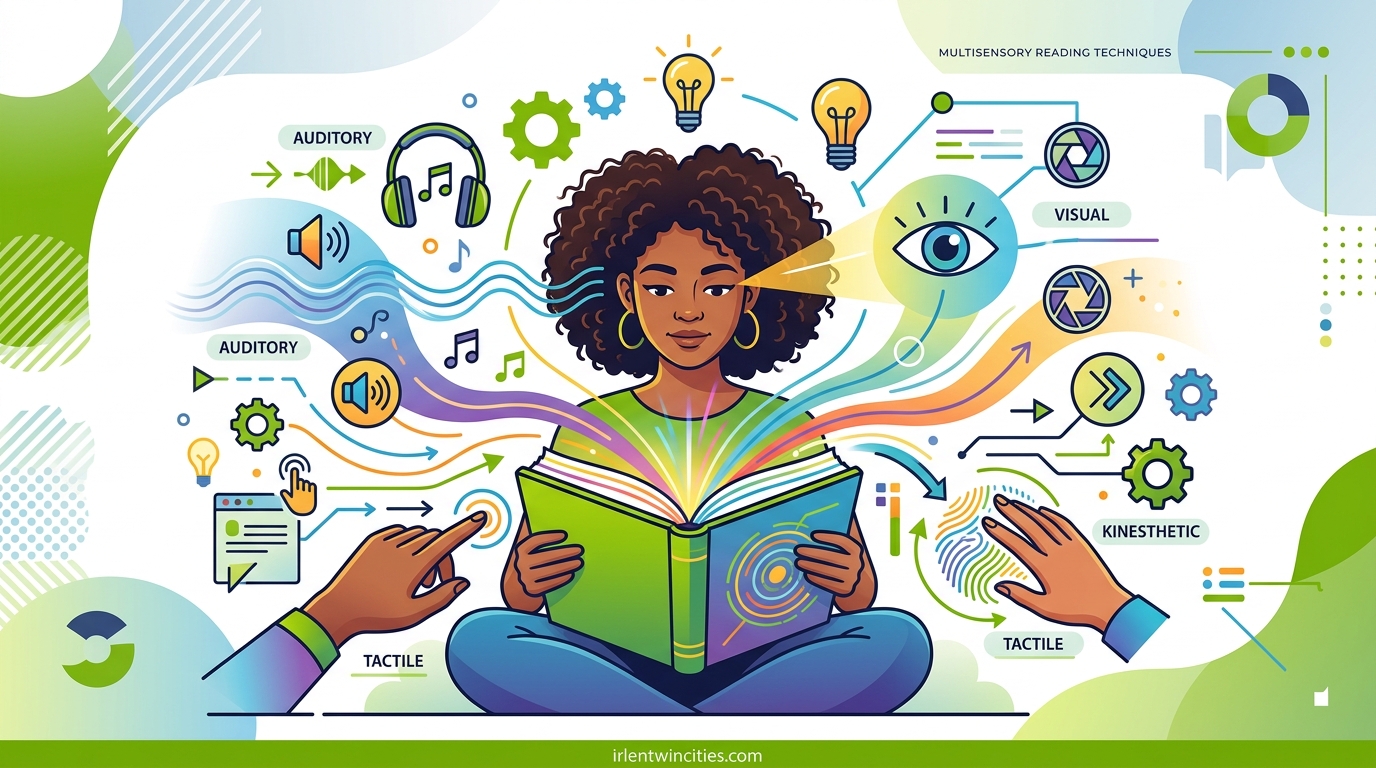
Multisensory reading techniques integrate multiple sensory pathways to teach literacy skills. The approach is based on the VAKT model: Visual (seeing), Auditory (hearing), Kinesthetic (moving), and Tactile (touching). When students engage multiple senses at once, they build more durable memory connections than through visual or auditory methods alone.
The roots of multisensory reading instruction trace back to the Orton-Gillingham approach, developed in the 1930s by Dr. Samuel Orton and Anna Gillingham. They recognized that students with dyslexia needed structured, sequential instruction that engaged multiple brain pathways. Modern structured literacy programs continue to use these principles, supported by decades of research on brain plasticity and neural development.
When a child traces a letter in sand while saying its sound aloud, three sensory channels activate simultaneously. The visual channel processes the letter shape. The auditory channel processes the phoneme. The tactile channel provides physical feedback. This triple-encoding creates multiple retrieval pathways in the brain, making the learning stick.
Neuroscience research supports this approach. Brain imaging studies show that multisensory instruction activates more neural networks than single-sense methods. For struggling readers, this can be the difference between information that enters short-term memory and knowledge that becomes permanently stored. The brain literally builds stronger connections when multiple senses are engaged.
It is important to understand that true multisensory instruction is not just random hands-on activities. Effective multisensory reading follows a structured, sequential approach. Skills build logically from simple to complex. Each activity has a specific learning purpose. Random sensory play without systematic instruction will not produce the same results as targeted multisensory teaching.
The term “structured literacy” has emerged in recent years to describe this systematic approach. Structured literacy encompasses the principles of Orton-Gillingham and similar evidence-based methods. It emphasizes explicit, cumulative instruction in phoneme awareness, phonics, fluency, vocabulary, and comprehension. Multisensory techniques are the delivery method that makes structured literacy accessible to all learners.
Multisensory Reading Techniques You Can Use Today
Here are eight proven multisensory reading techniques you can implement immediately. Each technique targets different combinations of sensory input. I have organized them by primary sensory focus, though most engage multiple senses simultaneously. Choose the techniques that best match your students’ needs and your available materials.
1. Sand or Shaving Cream Writing
This classic tactile technique engages touch and movement while reinforcing letter formation and spelling patterns. Students write letters, words, or phonograms in a thin layer of sand or shaving cream spread on a flat surface. The resistance of the medium slows down the writing process, forcing students to pay attention to each stroke.
Materials needed: A shallow tray, play sand or shaving cream, word list or letter cards for reference. Alternative: A Ziploc bag filled with hair gel and food coloring for mess-free tactile tracing.
How to implement: Spread a thin layer of sand or shaving cream in the tray. Have the student say the letter sound or word aloud. While vocalizing, they trace the letters with their index finger using proper formation. After forming the complete word, they sweep the surface smooth and repeat the process three times.
Age range: This works beautifully for ages 4 through adult learners. Older students often enjoy the sensory aspect more than they expect, especially when you use colored shaving cream or add a drop of essential oil for scent integration.
Skills targeted: Letter formation, spelling patterns, phoneme-grapheme correspondence, sight word recognition.
Pro tip: For a budget-friendly alternative, use a Ziploc bag filled with hair gel and food coloring. Students trace through the bag without the mess. This works especially well for virtual tutoring sessions where cleanup needs to be minimal. I have used this method with high school students in online sessions, and they find it surprisingly calming.
2. Air Writing and Sky Writing
Air writing engages large muscle groups while connecting visual and motor memory. Students write letters in the air using their whole arm, not just their finger. This gross motor approach builds muscle memory for letter formation while reducing the fine motor demands that can frustrate younger learners or students with motor difficulties.
Materials needed: No materials required. Optional: ribbon wands, light-up fingers, or laser pointers for visual tracking.
How to implement: Stand with feet shoulder-width apart. Hold the writing arm out straight with pointer finger extended. Say the letter sound aloud while writing the letter in the air. Make movements large and deliberate, at least 12-18 inches tall. Trace the letter at least three times while repeating the sound each time.
For visual learners, add a ribbon wand or light-up finger pointer. This creates a visible trail as they write. The visual feedback reinforces the letter shape and helps self-correction. Some students benefit from watching themselves in a mirror while air writing to strengthen the visual-motor connection.
Skills targeted: Letter formation, motor planning, visual-motor integration, phoneme awareness.
Pro tip: Have students close their eyes while air writing. Removing the visual channel forces them to rely on proprioception (body awareness) and auditory feedback. This strengthens the kinesthetic memory trace even further. I often have students air write with eyes closed, then open their eyes and write the same letter on paper. The transfer from kinesthetic memory to visual output is remarkable.
3. Sandpaper Letters and Texture Tracing
Montessori educators have used sandpaper letters for over a century with good reason. The tactile feedback from tracing rough sandpaper creates powerful muscle memory for letter formation. This technique is especially effective for students who struggle with reversals (b/d, p/q) or who need extra tactile input to anchor learning.
Materials needed: Sandpaper letter cards (commercial or homemade), smooth tracing surface for contrast.
How to implement: Place the sandpaper letter in front of the student. Have them trace the letter with their index and middle fingers together while saying the letter name and sound. The two-finger grip mimics the pencil grip they will use for writing. Trace three times, then have the student write the letter on paper without looking at the model. Finally, they check their work against the sandpaper card.
You can make your own sandpaper letters using cardstock, glue, and sand. For a temporary version, write letters on textured surfaces like denim, corduroy, felt, or even corrugated cardboard. The key is providing tactile resistance that contrasts with smooth paper.
Skills targeted: Letter formation, directionality, preventing reversals, tactile discrimination.
Pro tip: Store-bought sandpaper letters are expensive. I made a full alphabet set in one evening using 3×5 index cards, white glue, and craft sand from the dollar store. Total cost: under $5. The homemade versions work just as well, and you can customize the size for students who need larger letters.
4. Magnetic Letters and Letter Tiles
Manipulating physical letter tiles engages the kinesthetic sense while building phonemic awareness and spelling skills. Students physically build words, which creates a concrete connection between sounds and symbols. The physical act of selecting and placing tiles strengthens the sound-symbol mapping process.
Materials needed: Magnetic letters or foam letter tiles, magnetic board or flat surface, word lists organized by phonics pattern.
How to implement: Say a word aloud. Have the student repeat the word slowly, segmenting into individual sounds. For each sound in the word, they select the corresponding letter tile and place it in order from left to right. After building the word, they slide their finger under the tiles while blending the sounds together. Finally, they write the word on paper.
Color-coding tiles by phonics category enhances visual processing. For example, use red for vowels, blue for consonants, and green for digraphs. This visual scaffolding helps students recognize spelling patterns and understand syllable structure.
Skills targeted: Phonemic segmentation, blending, spelling patterns, syllable awareness.
Pro tip: For older students who might see letter tiles as “babyish,” use Scrabble tiles or Bananagrams instead. The game-piece aesthetic feels more age-appropriate while providing the same multisensory benefits. I have successfully used Scrabble tiles with high school students working on advanced morphology.
5. Read It, Build It, Write It
This three-step Orton-Gillingham technique is the gold standard for multisensory sight word instruction. It integrates visual, tactile, and kinesthetic processing in a structured sequence that maximizes retention. I use this technique daily with students of all ages, and the results are consistently impressive.
Materials needed: Word cards, letter tiles or magnetic letters, paper and pencil or writing surface.
How to implement: Present a word card. Step 1: The student reads the word aloud while running their finger under the letters from left to right. Step 2: The student builds the word using letter tiles, saying each letter name and sound as they place it. Step 3: The student writes the word while saying the letter names and sounds, then reads the completed word.
The three modalities reinforce each other. Reading establishes the visual pattern. Building provides tactile and kinesthetic input. Writing cements the orthographic mapping (connecting sounds to spellings). This comprehensive encoding is why the technique works so well for words that do not follow regular phonics patterns.
Skills targeted: Sight word recognition, orthographic mapping, spelling, visual memory.
Pro tip: For students with fine motor difficulties, let them use a tablet stylus for the “write it” step, or substitute with letter stamps. The goal is the multisensory encoding, not perfect handwriting. Some of my most successful students use alternative writing tools during this activity.
6. Tapping and Arm Tapping for Sounds
This phonemic awareness technique uses touch points to represent individual sounds in words. Students tap their fingers to their thumb or tap down their arm as they segment words into phonemes. The physical touch points make abstract sound segments concrete and countable. This is especially helpful for students who struggle to “hear” individual sounds in words.
Materials needed: No materials required.
How to implement: For finger tapping: Hold the non-dominant hand open with fingers extended. Say a word aloud. For each sound in the word, touch a finger to the thumb, starting with the index finger. After all sounds are tapped, blend the sounds together by sliding the thumb across the fingers while saying the complete word.
For arm tapping (better for longer words or students who need more movement): Extend the non-dominant arm with palm up. Say the word. Starting at the shoulder, tap down the arm for each sound: shoulder for sound 1, upper arm for sound 2, elbow for sound 3, forearm for sound 4, wrist for sound 5. Blend by sliding the hand back up the arm while saying the full word.
Skills targeted: Phonemic awareness, phoneme segmentation, blending, syllable division.
Pro tip: Combine tapping with movement for extra kinesthetic input. Have students jump for each sound, or step forward while tapping. This whole-body approach is especially effective for students with ADHD who need movement to maintain focus. I have seen dramatic improvements in phonemic awareness when students can move while working.
7. Play Dough and Clay Letters
Forming letters from play dough or modeling clay engages tactile and kinesthetic senses while developing fine motor strength. The resistance of the material provides proprioceptive feedback that reinforces letter shapes in memory. Students who struggle with traditional writing often succeed with this three-dimensional approach.
Materials needed: Play dough or modeling clay, letter formation cards for reference, smooth work surface.
How to implement: Roll the dough into snakes or logs. Say a letter sound aloud. Form the letter shape while continuing to vocalize the sound. Place the completed letter on a card showing the printed version for visual matching. Trace the dough letter with a finger while saying the sound again. Write the letter on paper to complete the sequence.
For added sensory input, use scented play dough (available commercially or make your own with essential oils). Scent creates an additional memory anchor. Some teachers match scents to letter categories: peppermint for vowels, lavender for consonants. This adds an olfactory dimension to the multisensory experience.
Skills targeted: Letter formation, fine motor development, proprioceptive feedback, letter-sound correspondence.
Pro tip: For students who struggle with letter formation, start with gross motor play. Have them make giant letters on the table surface without worrying about precise shapes. Gradually work toward smaller, more defined forms as motor control develops. This progression builds success and confidence before demanding precision.
8. Letter Hopscotch and Movement Games
Whole-body movement creates powerful kinesthetic memory anchors while burning energy that might otherwise disrupt learning. Letter hopscotch, alphabet jumping paths, and movement-based spelling games transform practice into play. These activities are particularly valuable for students with high energy levels or attention difficulties.
Materials needed: Chalk (for outdoor), masking tape (for indoor), letter cards, open space for movement.
How to implement: Create a hopscotch grid with letters instead of numbers. Students hop to a letter while saying its sound. For spelling practice, create a path of letter cards on the floor. Students step or hop from card to card, saying each sound as they land, then blend the full word at the end. The physical movement encodes the letter sequence in muscle memory.
Bean bag toss games work well for older students. Toss a bean bag onto a letter mat. Whatever letter it lands on, the student must say the sound, name a word starting with that sound, and air-write the letter. This combines multiple multisensory techniques in one activity.
Skills targeted: Gross motor integration, letter-sound fluency, spelling, attention and focus.
Pro tip: Movement games are perfect for transition times or brain breaks. Five minutes of active multisensory practice can be more effective than fifteen minutes of seated drill. Use these techniques to re-energize students between sedentary activities. I schedule movement-based reading practice after lunch when energy levels peak.
How to Implement Multisensory Reading at Home and School
Knowing the techniques is only half the battle. Successful implementation requires planning, adaptation, and consistent practice. Here is how to get started without overwhelming yourself or your learners. These strategies come from years of trial and error in both classroom and one-on-one settings.
Getting Started: First Steps
Start with just one or two techniques. Master those before adding more. I recommend beginning with sand writing and air writing. These require minimal materials and work across all age groups. Once these become routine, add a third technique.
Create a simple materials kit. A plastic bin can hold: a small sand tray, shaving cream, letter cards, magnetic letters, and play dough. Having everything in one place removes the friction of preparation. When materials are readily available, you are more likely to use them consistently.
Set a realistic schedule. Ten minutes of multisensory practice daily beats an hour once a week. Consistency builds neural pathways. Sporadic intensive practice does not create the same lasting changes. I schedule multisensory activities as a regular part of reading instruction, not as an occasional supplement.
Document what works. Keep a simple log noting which techniques your student responds to best. Every learner has different sensory preferences. Some students are highly tactile and love sand writing. Others are kinesthetic and need movement games. Pay attention to engagement and retention to identify the best approaches for each individual.
Adapting for Different Ages
A common concern from educators and parents is finding age-appropriate activities for older students. Elementary-aged children might love shaving cream, but middle schoolers often resist “babyish” activities. Here are age-specific adaptations that maintain dignity while delivering multisensory benefits.
Kindergarten through second grade: Embrace the play. Use colorful materials, scented options, and game formats. Young children naturally engage with sensory activities. Keep sessions short (5-10 minutes) and varied. Frequent changes maintain engagement. Let them explore freely within structured boundaries.
Upper elementary (grades 3-5): Frame activities as “brain training” or “athletic practice for reading.” Use Scrabble tiles instead of magnetic letters. Let students create content: write their own words to trace in sand, build stories using letter tiles. Give them ownership of the process. Older elementary students respond well to challenges and competitions.
Middle and high school: Focus on the science. Explain how multisensory input strengthens neural pathways. Use sophisticated materials: calligraphy pens for texture writing, architectural modeling clay, weighted pens for proprioceptive feedback. Incorporate technology: stylus writing on tablets, digital sand trays, typing with dictation software.
Older students benefit from understanding the why behind the activities. Share research on brain plasticity. Connect multisensory techniques to athletic training or music practice. These analogies help teenagers buy into approaches that might otherwise feel juvenile. I have had high school athletes make strong connections between muscle memory in sports and muscle memory in reading.
Virtual and Remote Learning Adaptations
Remote learning presents unique challenges for multisensory instruction. You cannot hand a student a sand tray through a screen. However, creative adaptations make virtual multisensory teaching possible. During the pandemic, I successfully transitioned my entire practice to remote delivery using these strategies.
Materials in advance: Send home simple supply kits. A Ziploc bag with salt, a small container of play dough, and printed letter cards costs under $2 per student. Many families already have shaving cream or flour that can substitute for sand. Clear communication with families about what to gather makes all the difference.
Digital alternatives: Use touchscreen devices for digital sand tray apps. Google Jamboard or similar whiteboard apps let students “write” with a stylus or finger while you observe. Screen sharing allows you to demonstrate techniques while students follow along. The key is real-time interaction, not just pre-recorded videos.
Body-based techniques: Air writing, arm tapping, and movement games translate perfectly to video calls. Students can stand back from the camera and demonstrate large movements. You can provide real-time feedback on form and technique. These zero-material techniques became the backbone of my remote teaching practice.
Home environment integration: Have students find textured surfaces in their home for tracing: carpet samples, denim fabric, textured wallpaper. This turns the limitation of separate locations into an exploration activity. Students enjoy the treasure hunt aspect of finding learning materials in their environment.
Why Multisensory Reading Works: The Science
The effectiveness of multisensory reading is not anecdotal. Research consistently shows that engaging multiple senses creates stronger, more durable learning than single-channel instruction. Understanding the science helps educators and families commit to these approaches with confidence.
Brain imaging studies reveal that multisensory activities activate broader neural networks. When students see, hear, say, and touch simultaneously, information gets encoded in multiple brain regions. This distributed storage means more retrieval pathways. If one neural route is blocked or underdeveloped, others remain accessible. This redundancy is especially valuable for learners with processing differences.
The concept of brain plasticity underlies multisensory instruction. Our brains can form new neural connections throughout life, not just during early childhood. Multisensory input accelerates this process by providing rich, varied stimulation. For students with dyslexia, who often have different neural organization for language processing, multisensory approaches bypass weak pathways and strengthen alternative routes. The brain literally rewires itself with appropriate stimulation.
Research on orthographic mapping explains why the “Read It, Build It, Write It” technique works so well. This is the process of connecting phonemes (sounds) to graphemes (letters) and bonding them in permanent memory. Multisensory encoding creates stronger orthographic mappings than visual exposure alone. Students who trace, build, and write words develop more complete mental representations of those words. They recognize them faster and spell them more accurately.
Studies on the Orton-Gillingham approach consistently show significant gains for struggling readers. A comprehensive meta-analysis of Orton-Gillingham interventions found positive effects on phonological awareness, word reading, and spelling. The structured, multisensory nature of the approach produces measurable results that persist over time.
Students with dyslexia are not the only ones who benefit. Research on universal design for learning shows that multisensory approaches improve outcomes for all learners. English language learners, students with ADHD, gifted learners, and typical readers all show gains from multisensory instruction. What helps those who struggle most often elevates everyone. This is the principle of universal design: accommodations that benefit the edges of the learning spectrum help the entire group.
Frequently Asked Questions
What are multisensory reading strategies?
Multisensory reading strategies are teaching methods that engage two or more senses simultaneously—sight, sound, touch, and movement—to help students build stronger neural connections for literacy learning. Common strategies include sand writing, air writing, letter tiles, and tapping out sounds while speaking.
How long does it take to see results with multisensory reading?
Most educators report seeing initial improvements within 2-4 weeks of consistent daily practice. Significant gains in reading fluency and spelling typically appear after 8-12 weeks of structured multisensory instruction. Individual results vary based on the student’s starting point, consistency of practice, and specific learning needs.
Is multisensory reading only for dyslexia?
No, multisensory reading benefits all learners. While it is essential for students with dyslexia and learning disabilities, research shows that typical readers, English language learners, and students with ADHD also show improved outcomes with multisensory approaches. The techniques support universal design for learning principles that help everyone.
What materials do I need to get started?
You can start with minimal supplies: a shallow tray and salt or sand for tactile writing. Additional helpful materials include magnetic letters or letter tiles, shaving cream, play dough, and sandpaper. Many activities require no materials at all—just air writing and arm tapping work with nothing but space and attention.
Can multisensory techniques work for older students?
Absolutely. While young children enjoy sensory play naturally, older students benefit from multisensory approaches when activities are framed appropriately. Use sophisticated materials, explain the neuroscience behind the techniques, and connect multisensory practice to athletic training or skill development metaphors that resonate with teenagers.
Start Your Multisensory Reading Journey Today
You now have eight proven multisensory reading techniques ready to implement. Start small. Choose one technique that appeals to you. Gather simple materials. Try it for a week. Notice how your learner responds. Build from there.
Remember Marcus, the student who lit up when we tried shaving cream writing? He is now reading at grade level. His mother told me last month that he actually chooses to read for fun. That transformation started with a single multisensory activity. The confidence he gained in that first successful experience carried him through years of reading growth.
Whether you are a classroom teacher managing thirty students, a homeschooling parent working one-on-one, or a tutor supporting a struggling reader, these techniques adapt to your situation. The principles remain constant: engage multiple senses, provide structured sequential instruction, and make learning active rather than passive.
The science is clear. The techniques are proven. Educators have used these approaches for nearly a century with consistent success. The only question is which activity you will try first. Pick up that tray of sand. Start your multisensory reading journey today.